What you’ll achieve
By the end of this guide your Auto Track Location screen reads Tracking in background with a green dot, and the app logs the country you are in without you opening it.
iOS asks for location access in two stages, and the second one is the stage that matters. A guide that stops after the first prompt leaves you with tracking that only works while the app is on screen.
Step 1: Open the tracking screen
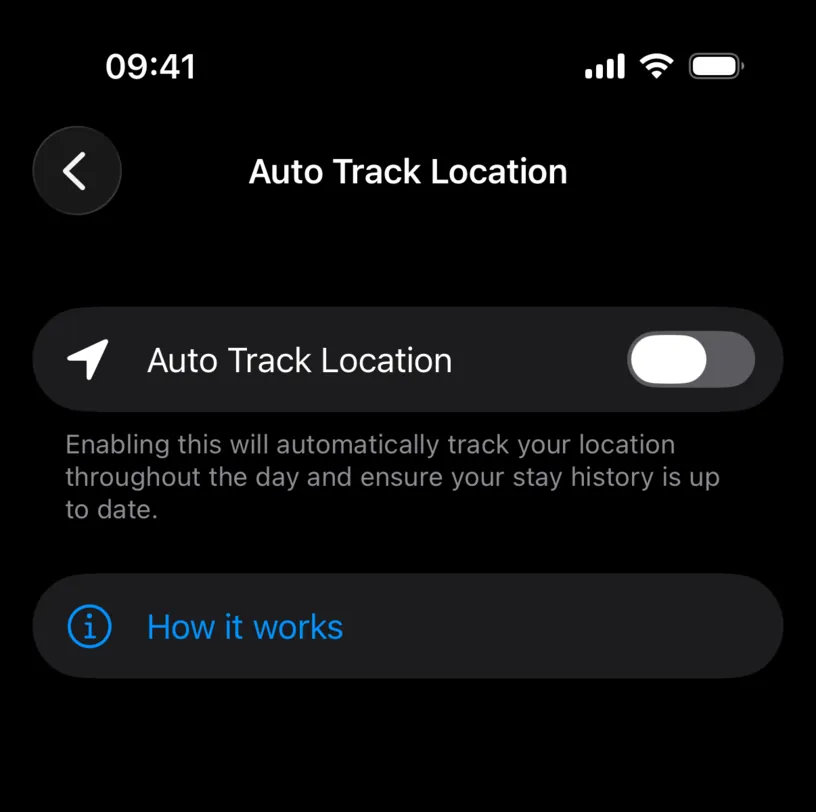
Open the Settings tab and find Auto Track Location under App Features. The row shows the current state, Off on a fresh install.
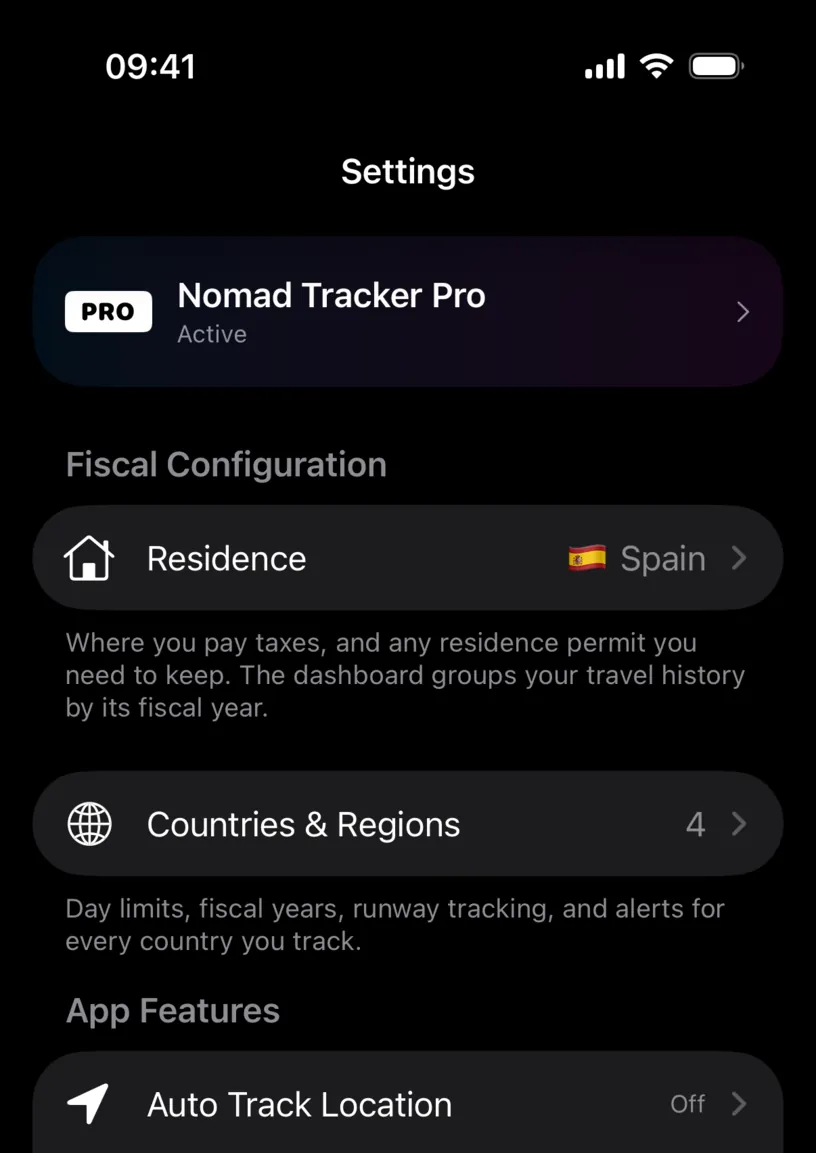
Tap it. The screen holds one switch, its explanation, and a How it works button.
Step 2: Read what you are turning on
Tap How it works before the switch. It is four pages, and the two worth reading are Smart Tracking and System Limitations.
Smart Tracking names the mechanism: the app uses Significant Location Changes, so it updates when you travel rather than following you around the block. That is the reason tracking costs almost no battery.
System Limitations names what stops it: Low Power Mode, Background App Refresh turned off, Airplane Mode, and a device restart, after which you open the app once.
The last page is the one this guide is about.
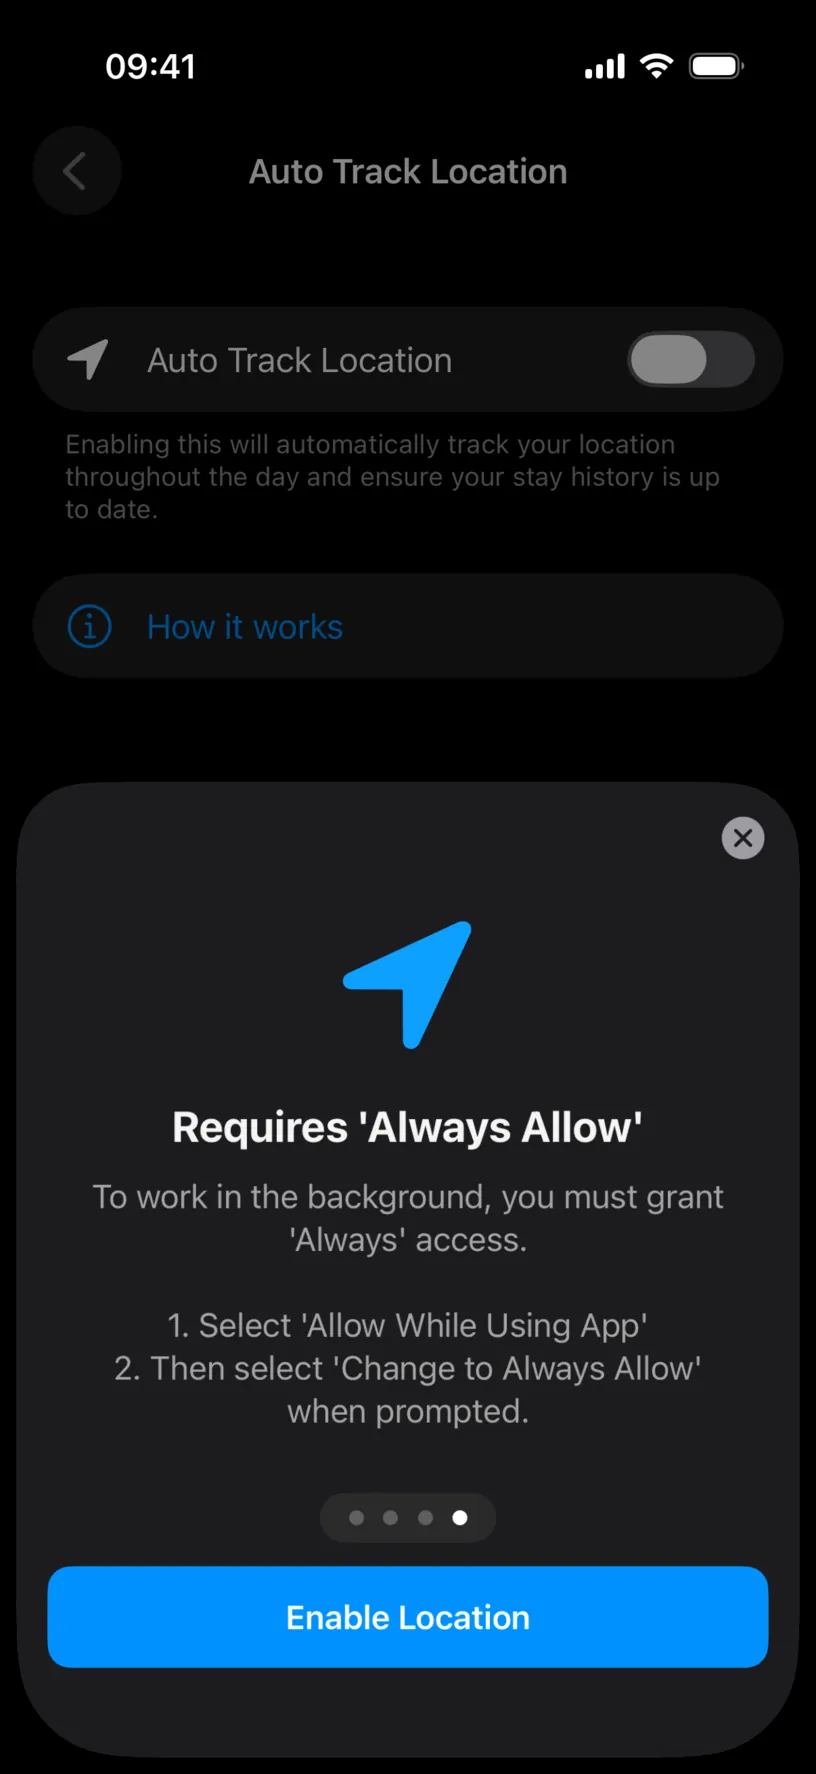
Tap Enable Location on that page, or Close the sheet and use the switch. Both reach the same prompt.
Step 3: Grant location access while using the app
iOS asks first, in its own dialog: Allow “Nomad Tracker” to use your location?
Tap Allow While Using App.
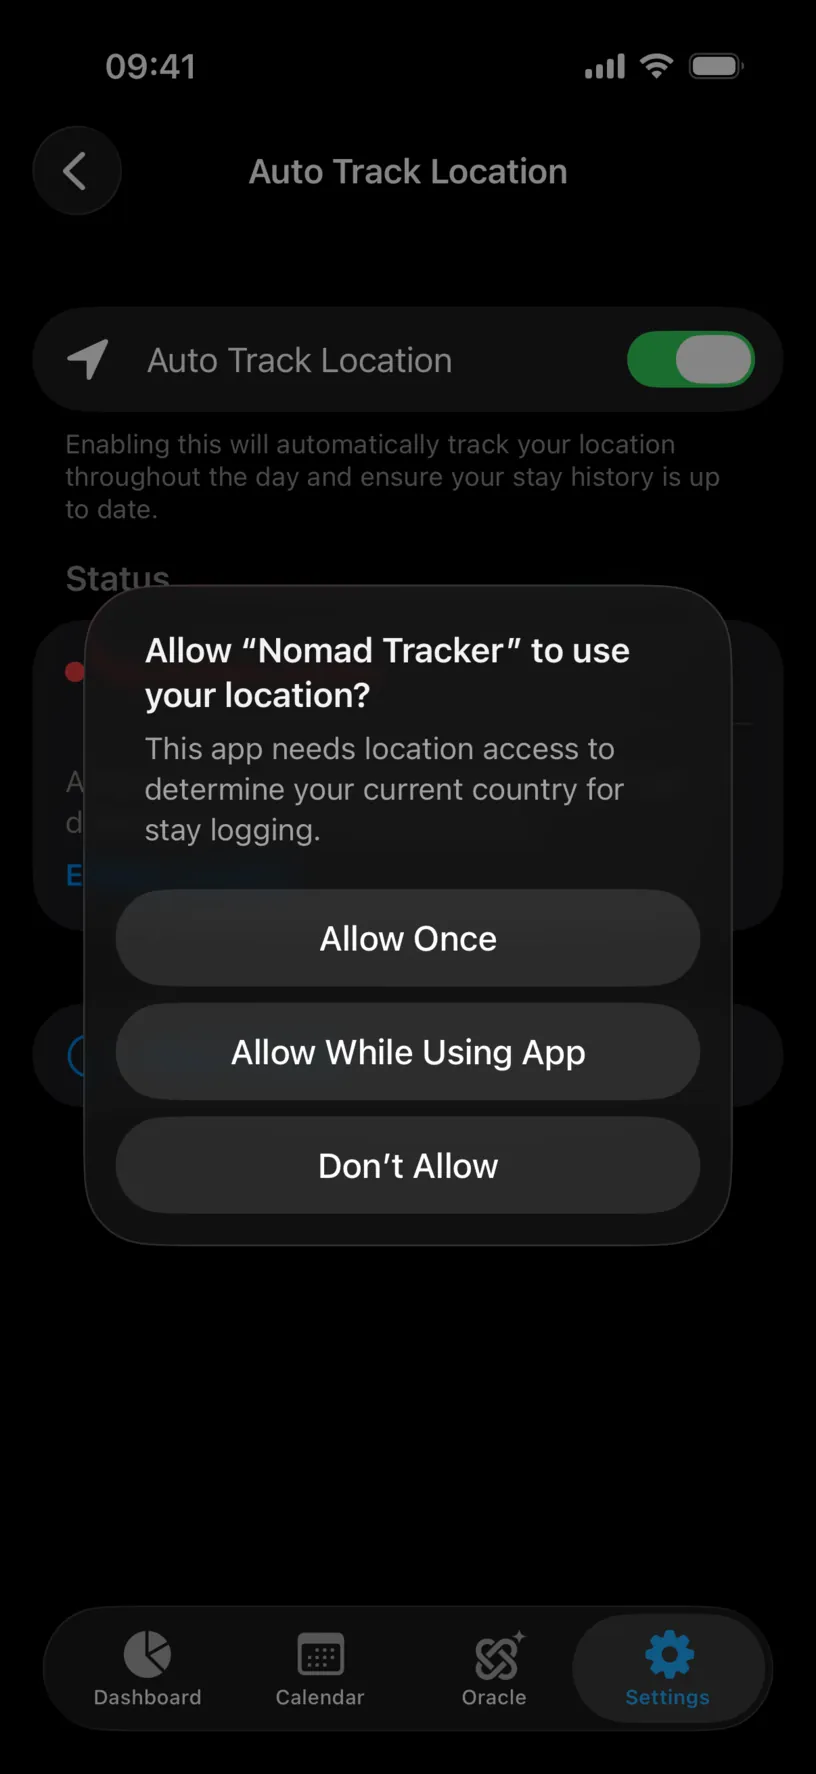
Allow Once grants access until you close the app, which is not enough for a tracker. Don’t Allow blocks it, and iOS will not ask again from inside the app.
Step 4: Upgrade the permission to Always
The switch is now on, and a Status section has appeared. It reads Only while app is open with an orange dot, and it says what is missing: to keep logging your days while the app is closed, the app needs Always location access.
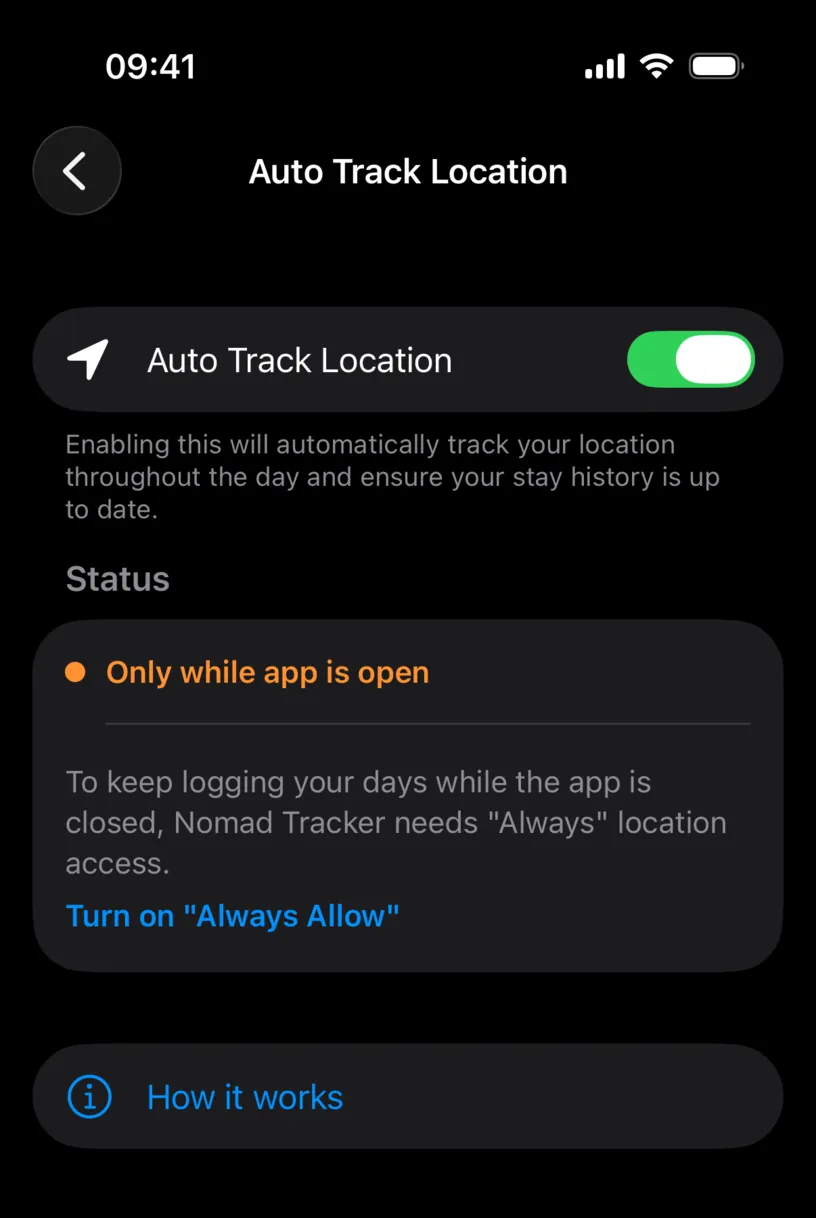
Tap Turn on “Always Allow”. iOS asks again, this time whether the app can use your location when you are not using it.
Tap Change to Always Allow.
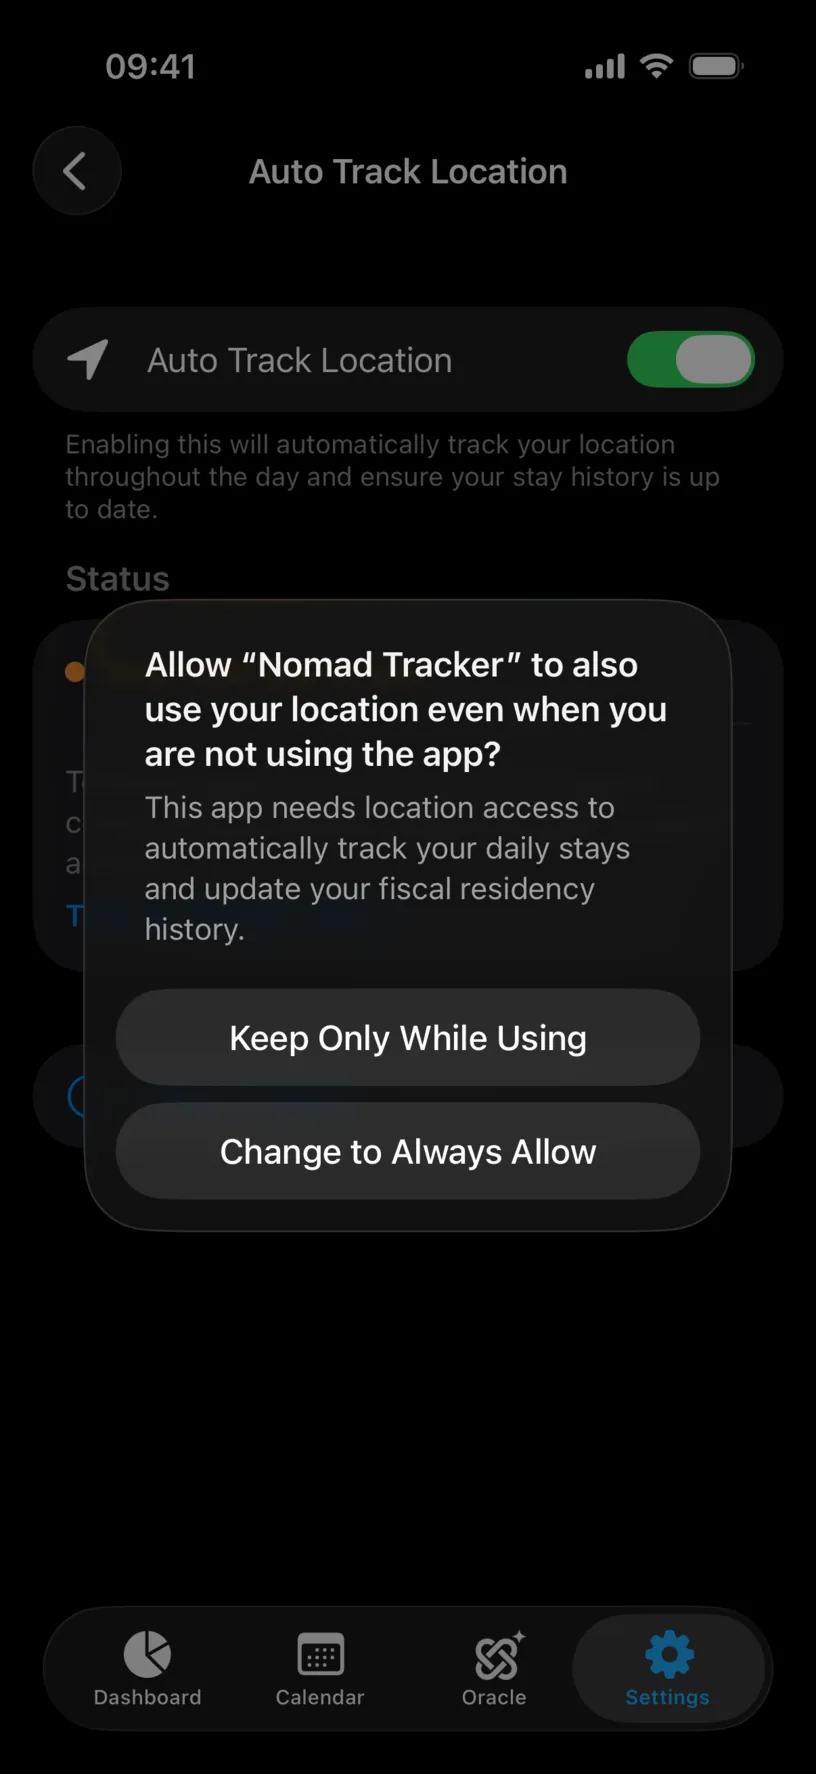
This second prompt is an iOS rule, not an app decision. Apps cannot ask for background location up front, so every app that needs it has to ask twice.
Check your result
Status now reads Tracking in background with a green dot, and the card asking for more access is gone.
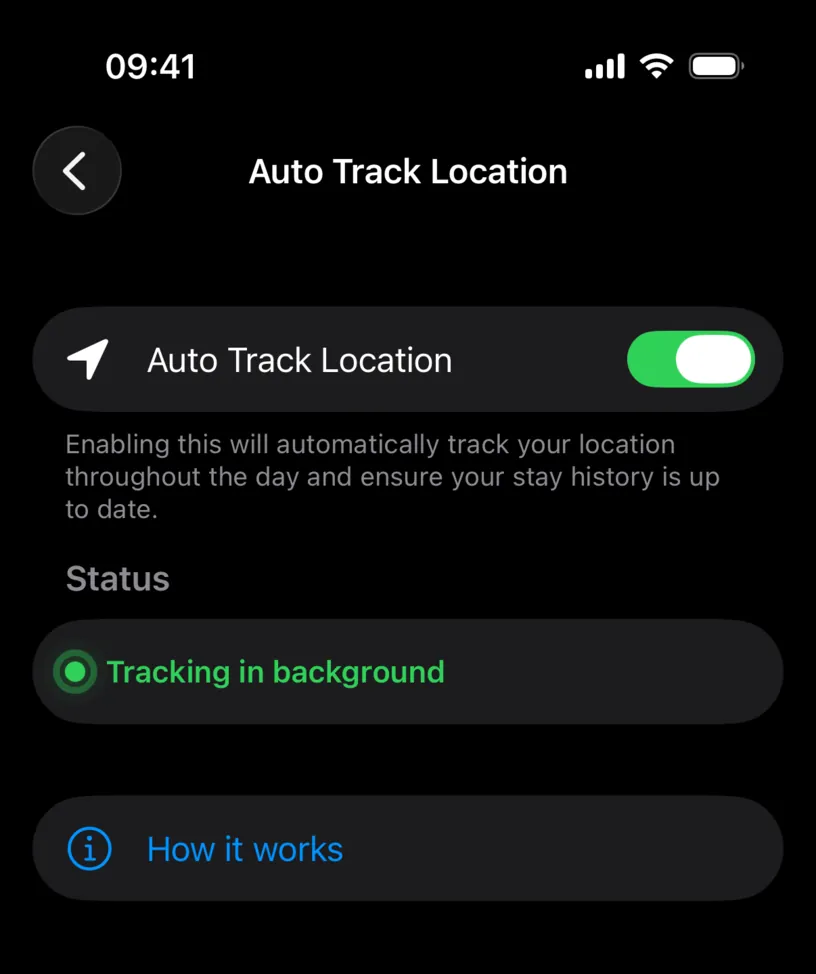
Go back to Settings. The Auto Track Location row reads On.
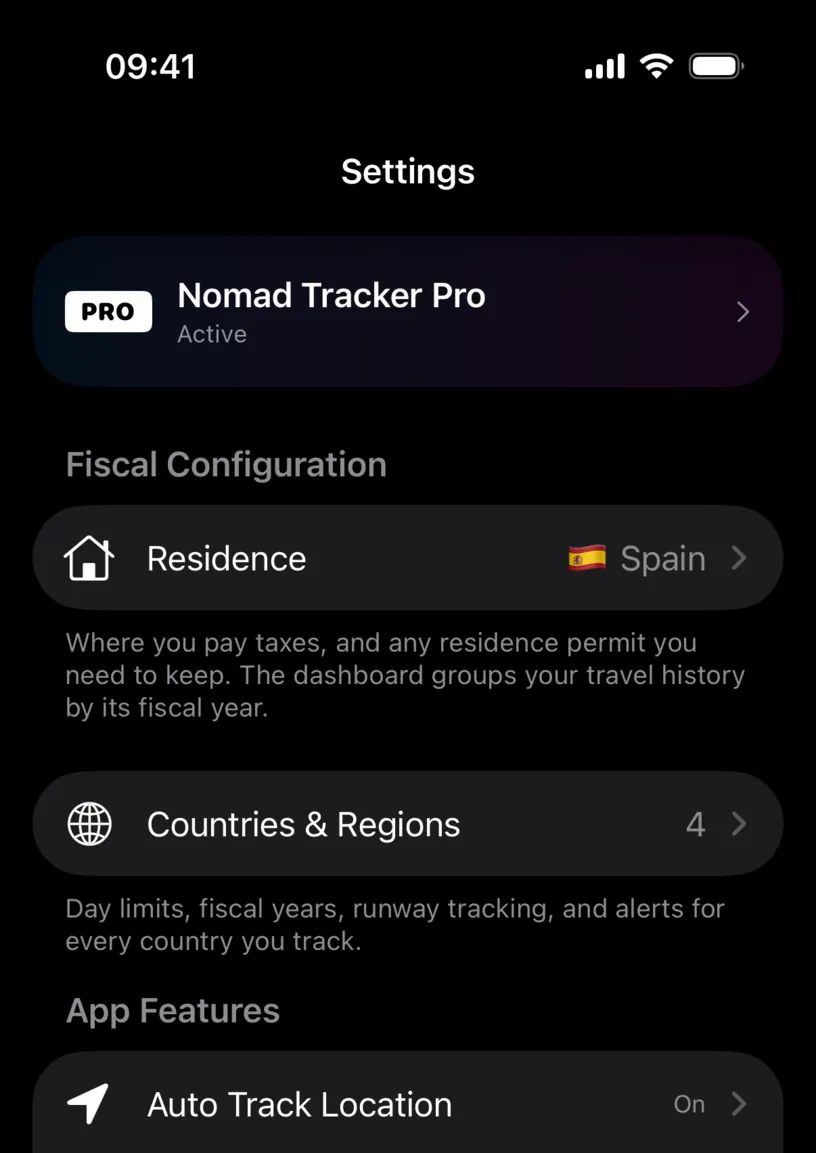
Those two together are the whole result: switch on, permission full. The first logged day appears in the Calendar tab, and it can take a while, because the app waits for a significant location change rather than polling.
If something looks different
The status reads Only while app is open. The second prompt was answered with Keep Only While Using, or never appeared. Tap Turn on “Always Allow” on the same screen and answer Change to Always Allow.
The status reads No location access, in red. Location is denied at the iOS level. The app shows a Location Access Required alert with an Open Settings button, because a denied permission cannot be re-asked from inside an app. In the iOS Settings app, open Nomad Tracker, then Location, and choose Always.
There is no Status section at all. It appears only while the switch is on. With the switch off there is nothing to report, and the dashboard Location tile says Tracking off in red.
The Calendar tab says Background tracking paused. Same cause as the orange status, shown where you are more likely to see it. The Turn on “Always Allow” button next to it does the same thing as the one in Settings.
Tracking is on and no days are appearing. Check the System Limitations page again. Low Power Mode and Background App Refresh are the two usual culprits, and both live in the iOS Settings app, not in Nomad Tracker.
A day is logged with the wrong country. Border regions and long flights confuse any location-based guess. Open the day in the Calendar tab and correct it: what you enter by hand outranks what the app detected.
Next steps
Automatic tracking only fills days from today forward. To fill in the trips you already took, open the Calendar tab, tap Add, and use Scan Photos.
Read your dashboard at a glance explains the counters your logged days feed, and its widget strip has a Location tile that shows this same tracking status without a trip into Settings.