What you’ll achieve
By the end of this guide the Document Vault asks for Face ID before it shows anything, so handing someone your unlocked iPhone does not hand them your passport.
Everything in the vault is encrypted on disk whether you turn this on or not. The lock is about who can open the screen.
Step 1: Find the setting
Open the Settings tab and scroll to Documents & Security.
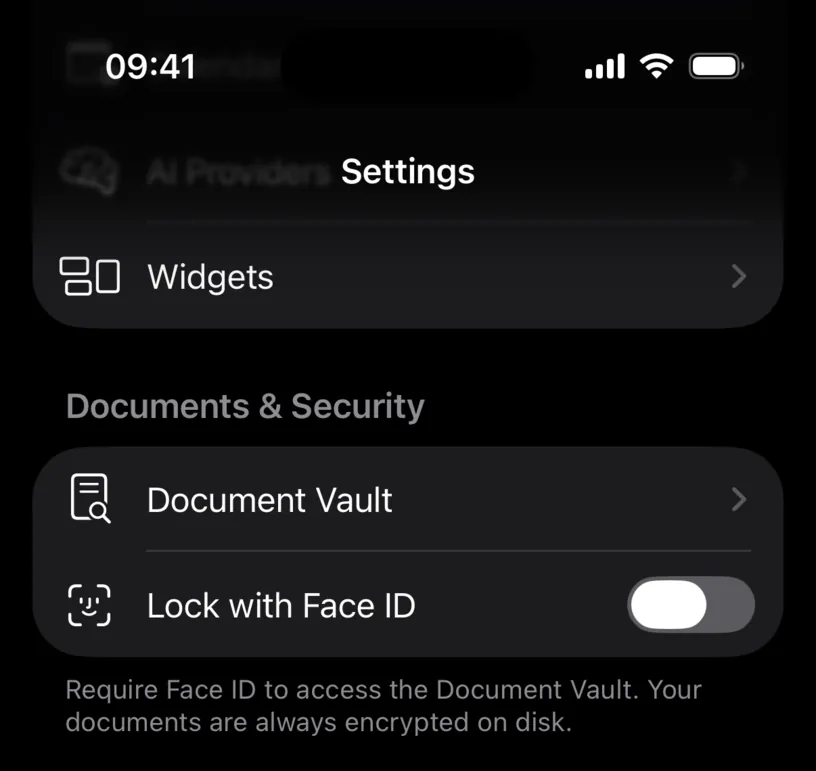
The section holds two rows. Document Vault opens the documents, and Lock with Face ID decides whether it opens straight away.
The footer says what each half does: Require Face ID to access the Document Vault. Your documents are always encrypted on disk.
On an iPhone with Touch ID the row reads Lock with Touch ID instead, and the rest of this guide is the same.
Step 2: Turn the lock on
Tap the switch. iOS runs Face ID before the setting changes, so the lock cannot be enabled by someone holding your phone.
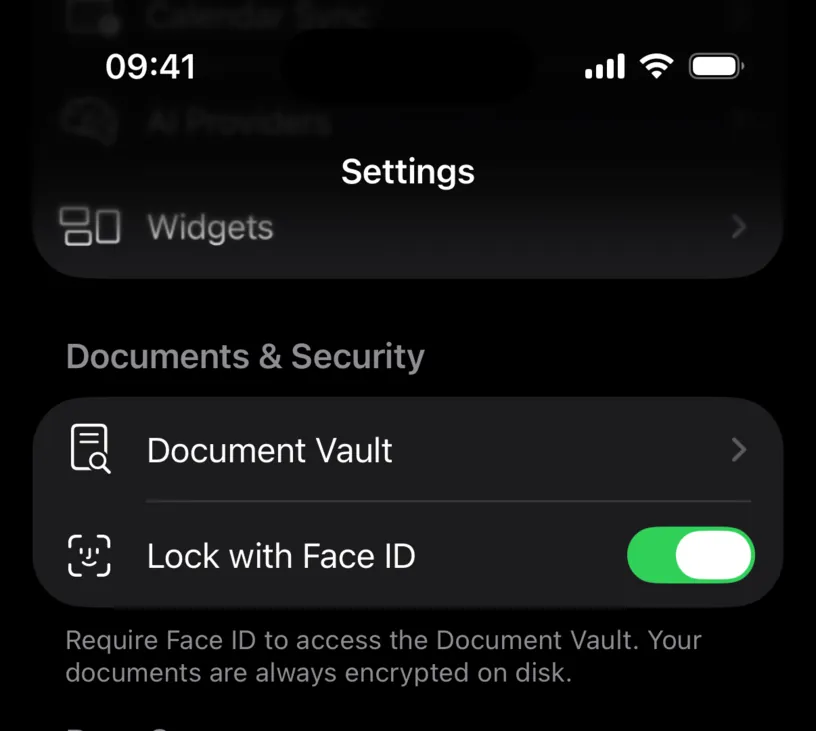
If the scan fails or you cancel it, the switch goes back to off. Nothing is half applied.
Step 3: See the locked vault
Tap Document Vault. The screen now asks for Face ID as it opens, and behind the prompt the vault shows nothing.
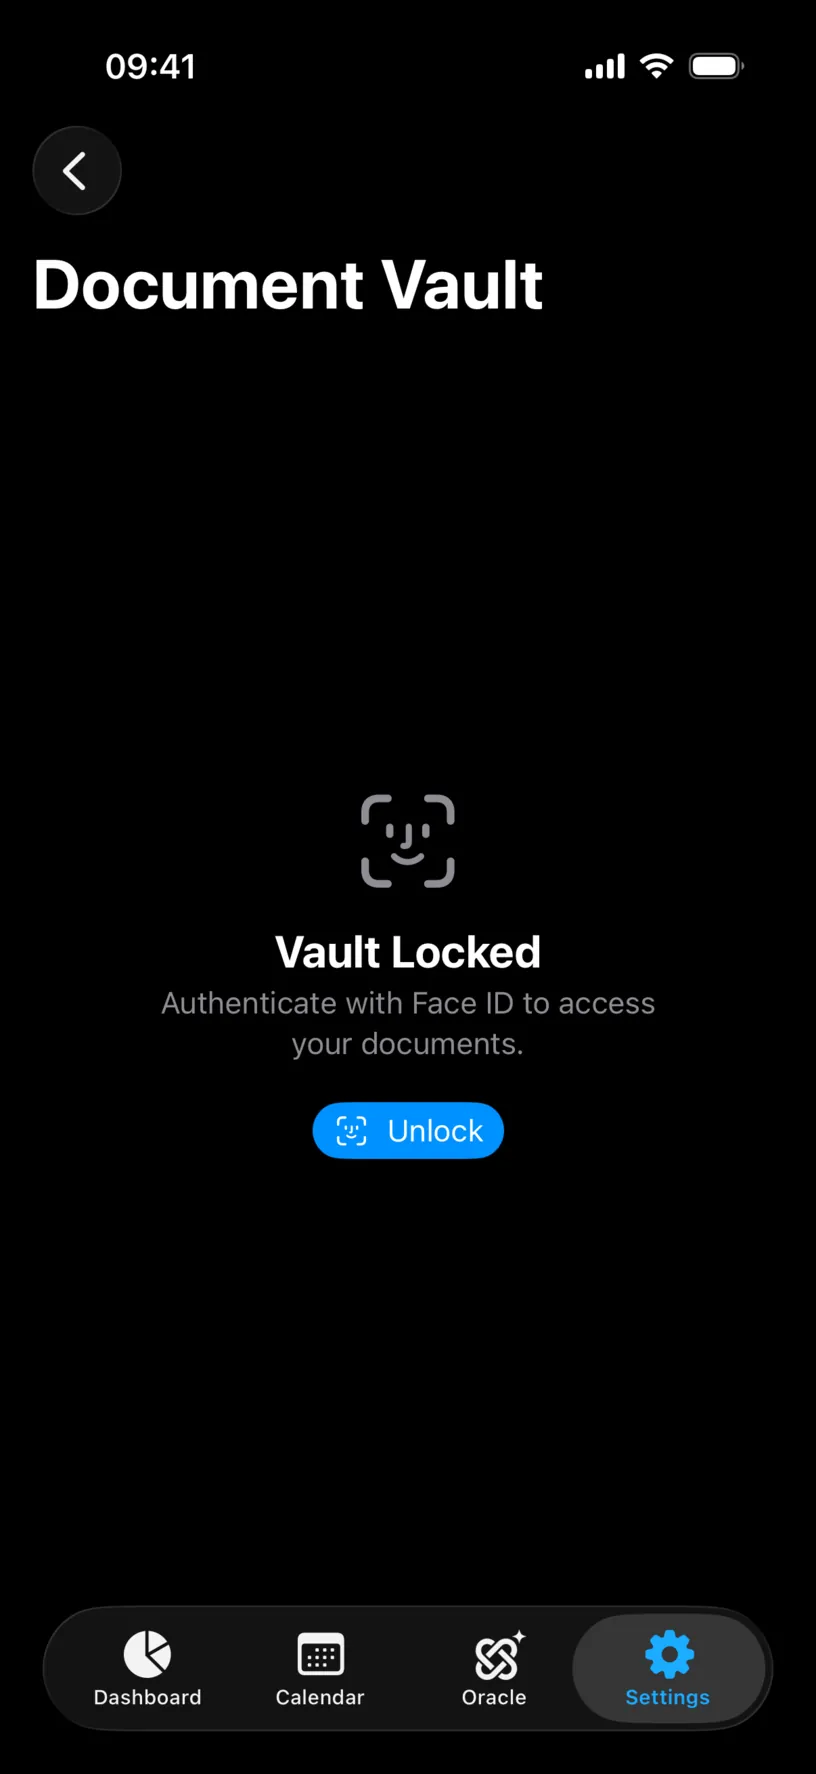
Cancel the scan and this is what is left: Vault Locked, the sentence Authenticate with Face ID to access your documents. and an Unlock button. The + in the toolbar is gone too, so nothing can be added past the lock either.
Tap Unlock to try again.
Check your result
A successful scan drops you straight into the list you already know.
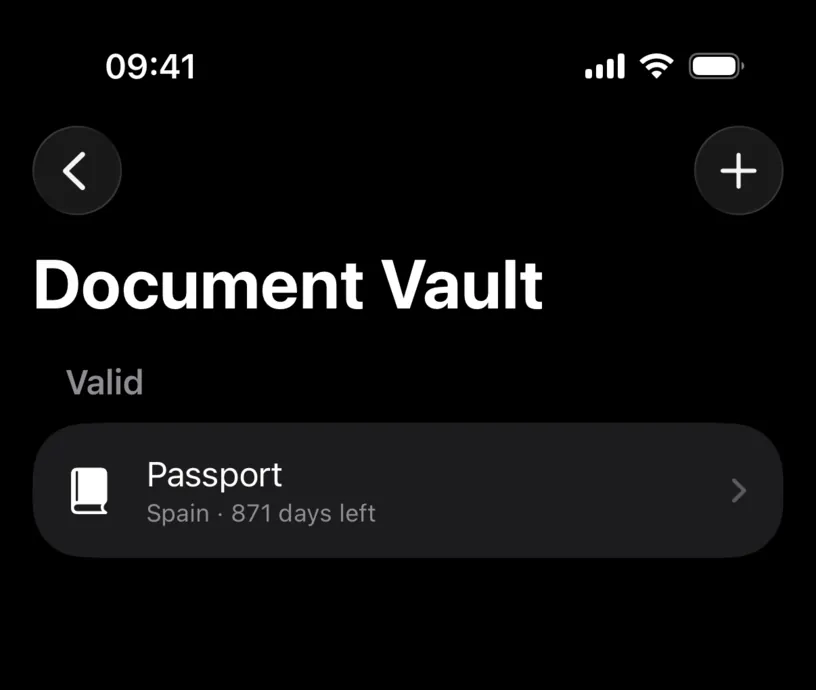
Leave the screen and come back, and the vault asks again. The unlock lasts for the visit, not for the day.
To turn the lock off, tap the same switch. Turning it off asks for nothing, so do it only on a phone you are the only person holding.
If something looks different
There is no Lock with Face ID row. The iPhone has no biometrics enrolled. Set up Face ID or Touch ID in the iOS Settings app first, then come back and the row appears.
Face ID never appears when you open the vault. The switch is off. It is off by default, so a vault you have never protected opens on the first tap.
The scan fails twice and the vault stays shut. Tap Unlock to run Face ID again. There is no passcode fallback on this screen, so a face the phone refuses means using the iPhone from a position where Face ID works.
You want the documents gone, not locked. Deleting your travel data does not touch the vault. Remove documents one by one, which Review and manage saved documents covers.
Next steps
Organize your document vault covers getting passports, visas and permits into the vault in the first place.
Review your privacy settings shows the rest of what the app keeps on the device and what it never collects.