What you’ll achieve
By the end of this guide you can look at a coloured dot in Nomad Tracker and say whether your days are being logged, and what the app is waiting for if they are not.
There are four states and never more than one problem at a time, so the app always offers exactly one action. Green means there is nothing to do.
Step 1: Open the status
Open the Settings tab and tap Auto Track Location. A Status section sits under the switch.
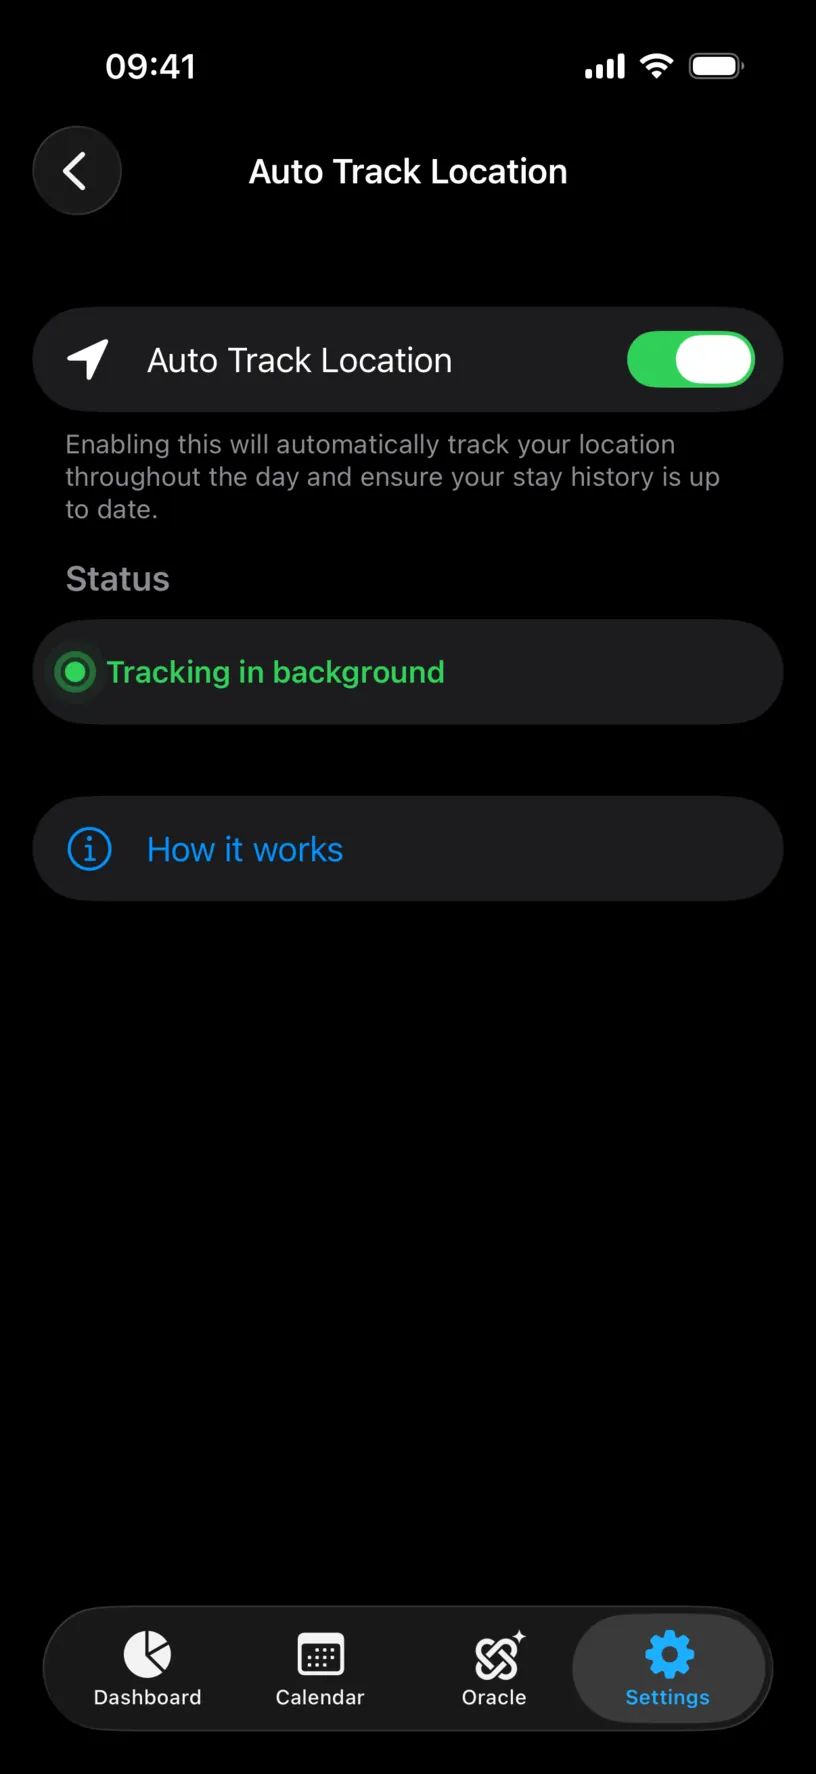
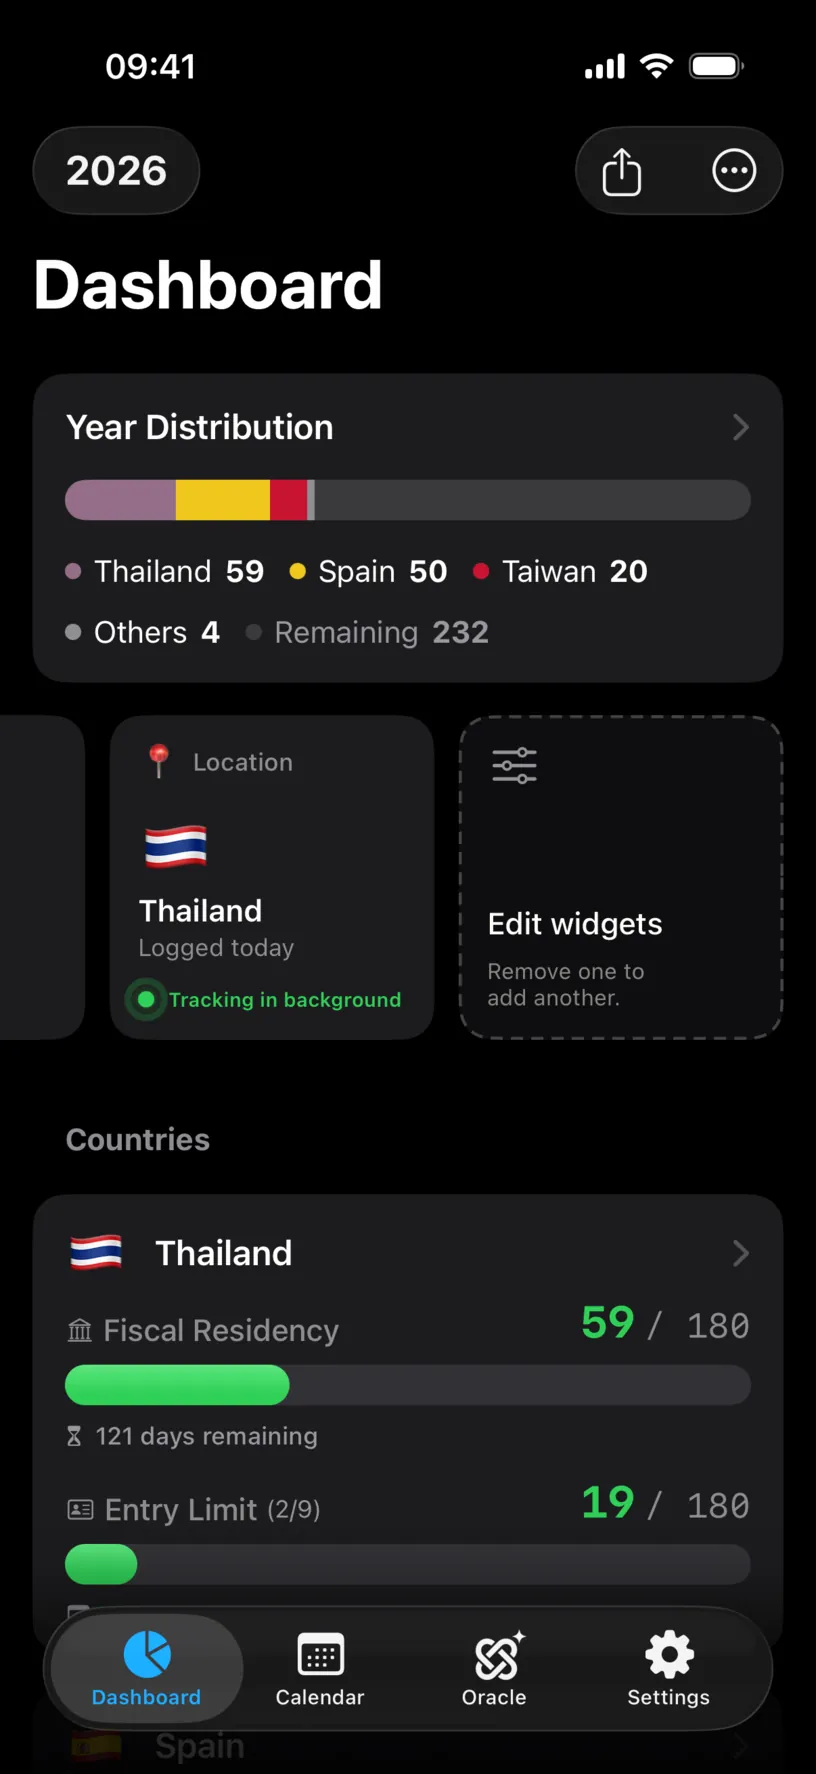
Tracking in background, in green, is the finished state. The dot pulses, the app logs the country you are in every day on its own, and no card asks you for anything.
Step 2: Learn the other three
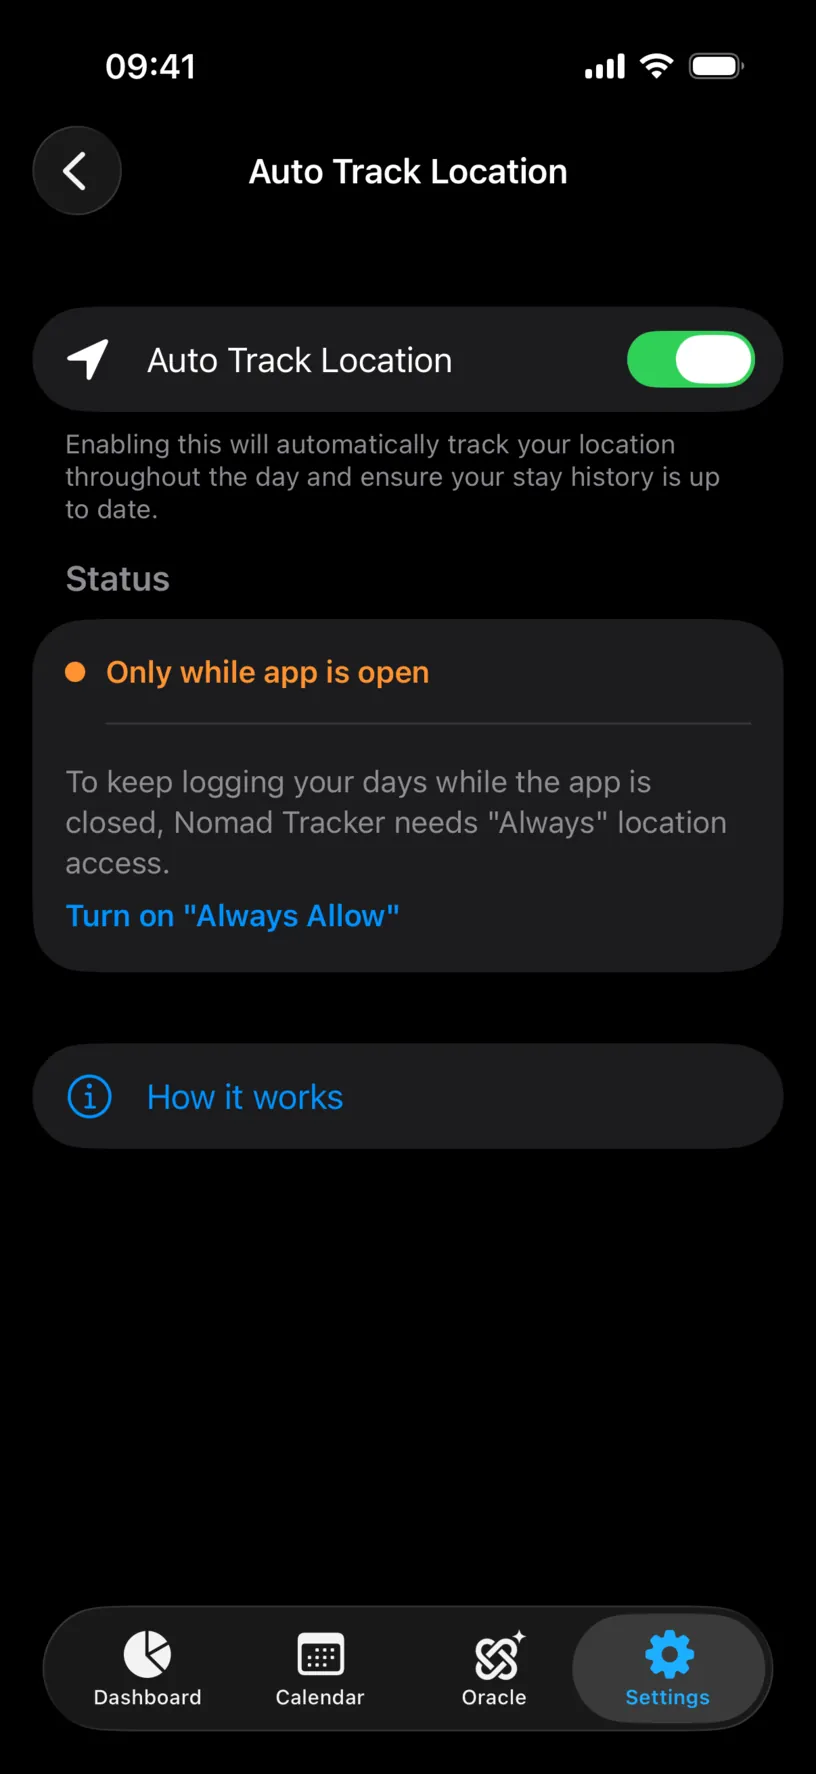
Only while app is open, in orange, means the permission stopped at While Using the App. Your country is logged when you open Nomad Tracker and nothing happens in between, so any day you skip the app is a day with no entry.
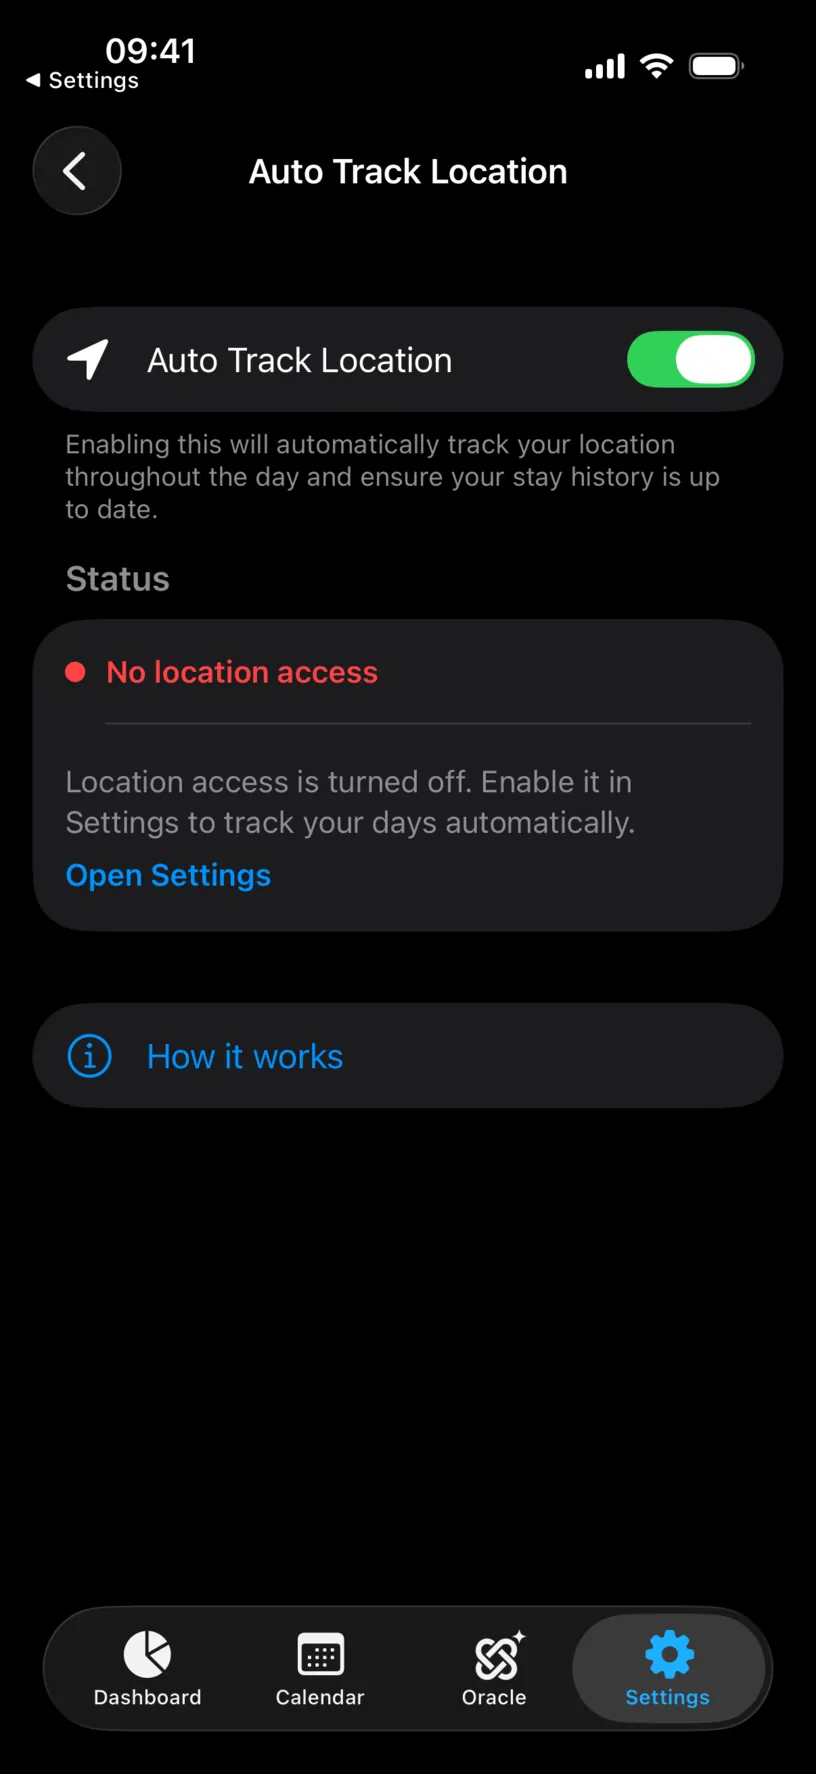
No location access, in red, means the switch is on and iOS is giving the app nothing: access is denied, restricted, or was never granted. This is the state worth knowing, because the switch says on while nothing is being recorded.
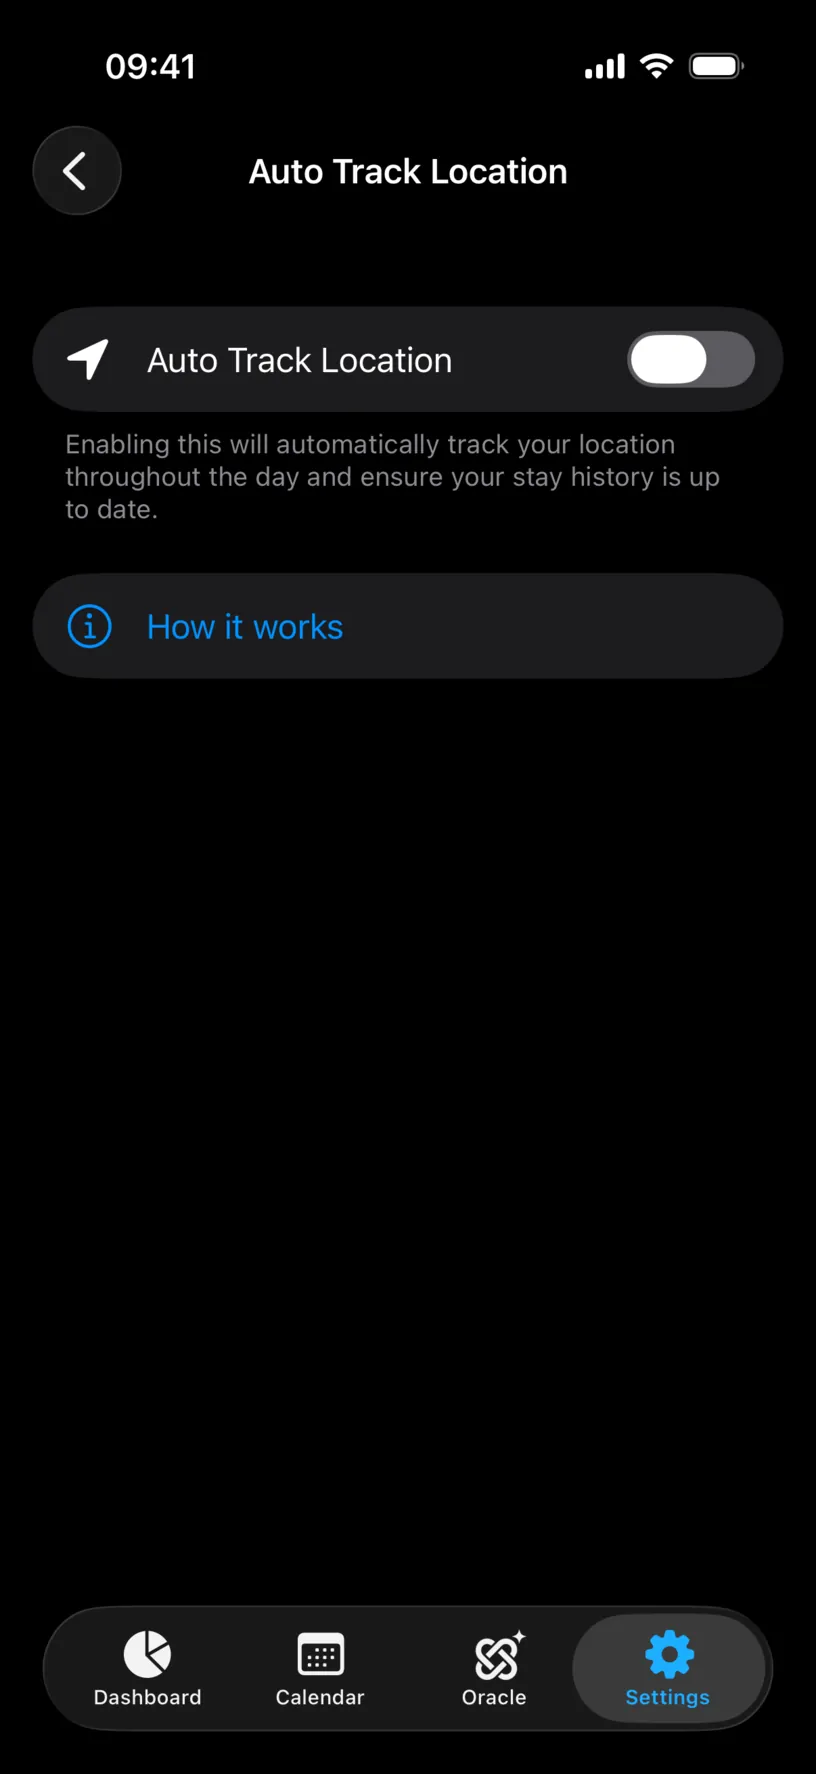
Tracking off is the fourth, and the Settings screen does not show it. With the switch off there is no Status section at all, because there is nothing to report.
Each state carries one action underneath it, and the wording is the action. Orange offers Turn on “Always Allow”. Red offers Open Settings, because iOS refuses to let an app ask twice. Green offers nothing.
Step 3: Put the status where you look
The Settings tab is a poor place for something you want to notice. Move it to the dashboard.
Open the Dashboard tab, scroll the widget strip to its end, and tap Add a widget. If the strip says Edit widgets instead, you already have three tiles; swipe left on one in the list to remove it first.
Under Add, choose Current location, described as “Where you are today, and whether automatic tracking is working”.
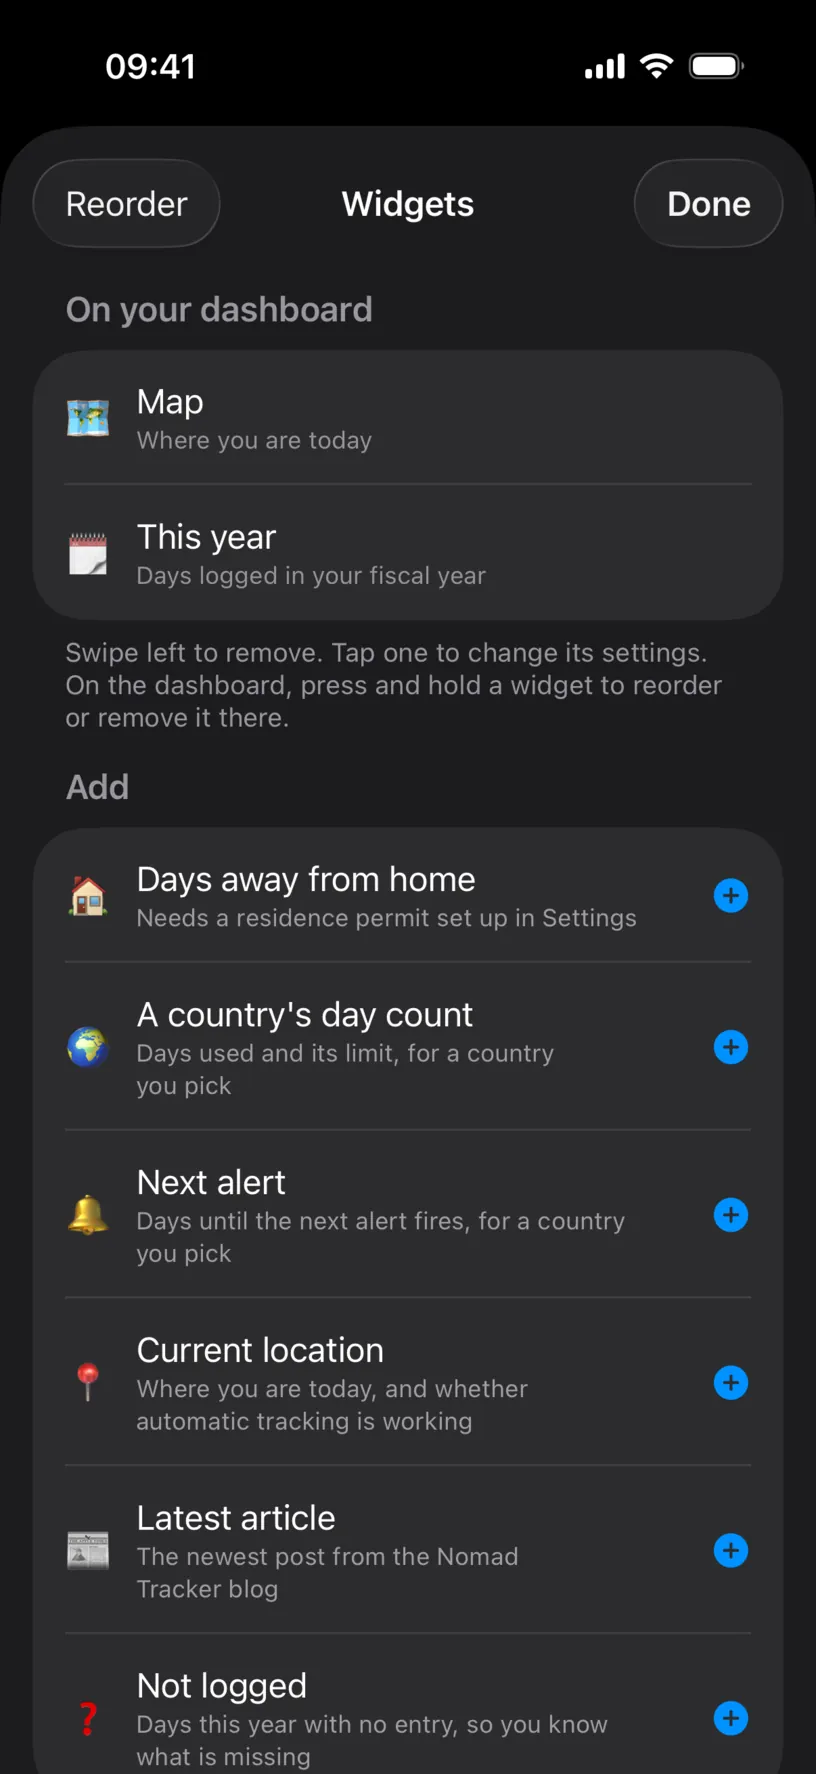
Tap Done. The tile joins the strip with the country you are in, when it was last logged, and the same coloured status line.
Step 4: Tap the tile for the fix
A coloured dot is a verdict with no explanation. Tapping the tile opens Location tracking, which spells the state out in a sentence and offers the single button that moves it forward.
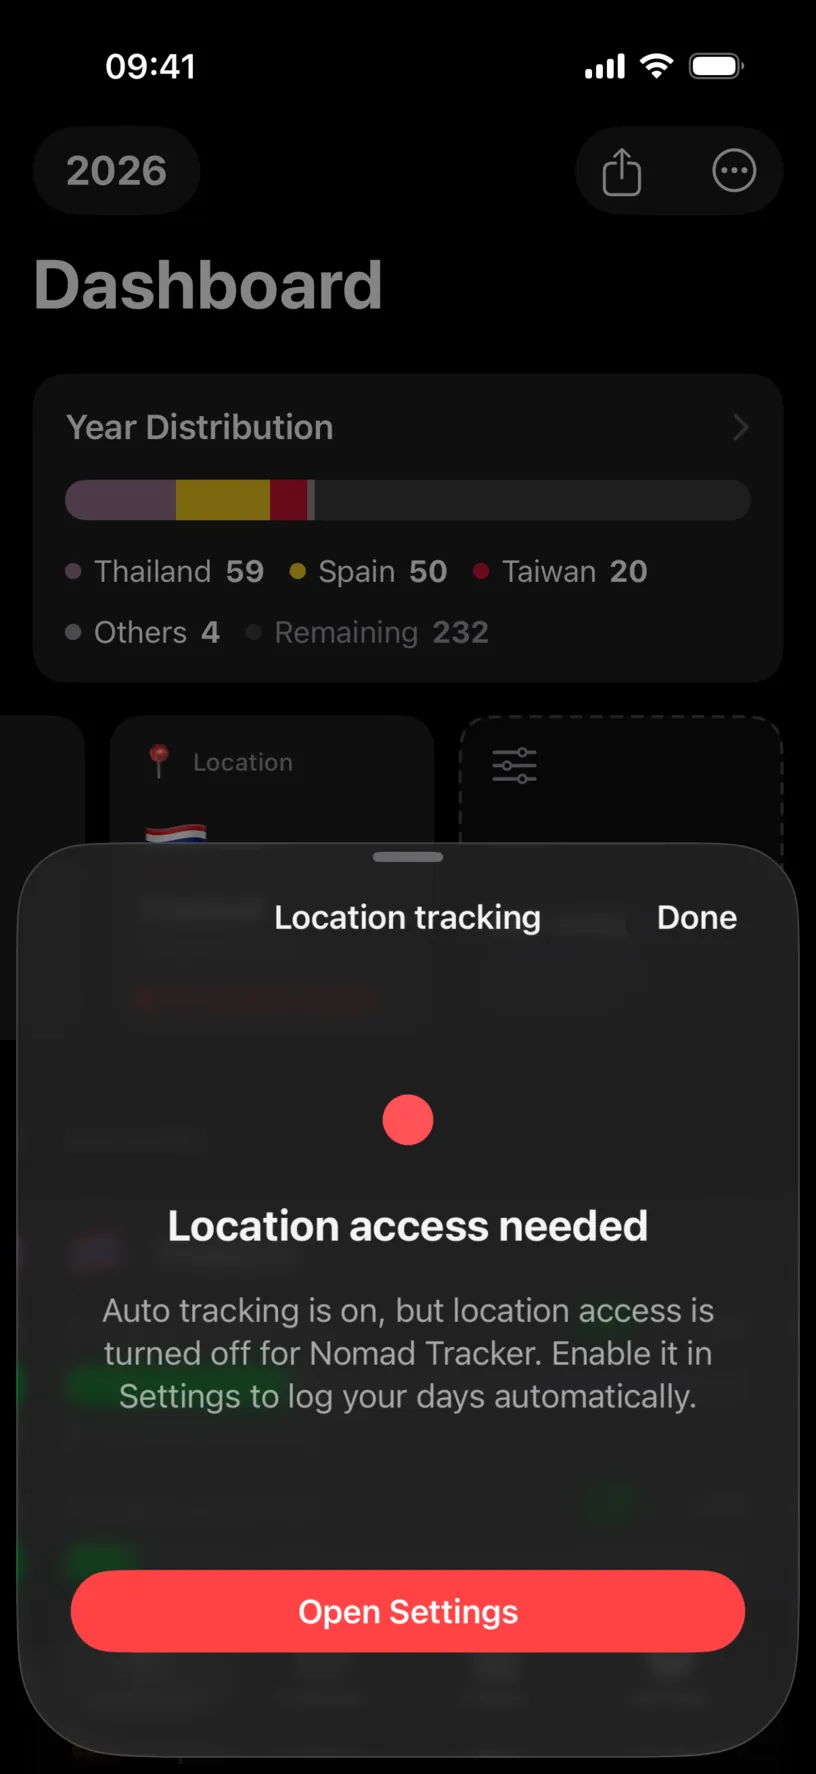
The sheet reads the live state, so answering a prompt from here turns it green without closing and reopening it.
Step 5: Recognize the calendar pill
The Calendar tab shows a pill above the grid whenever tracking is on but cannot do its job unattended. It carries the same button as the Settings card.
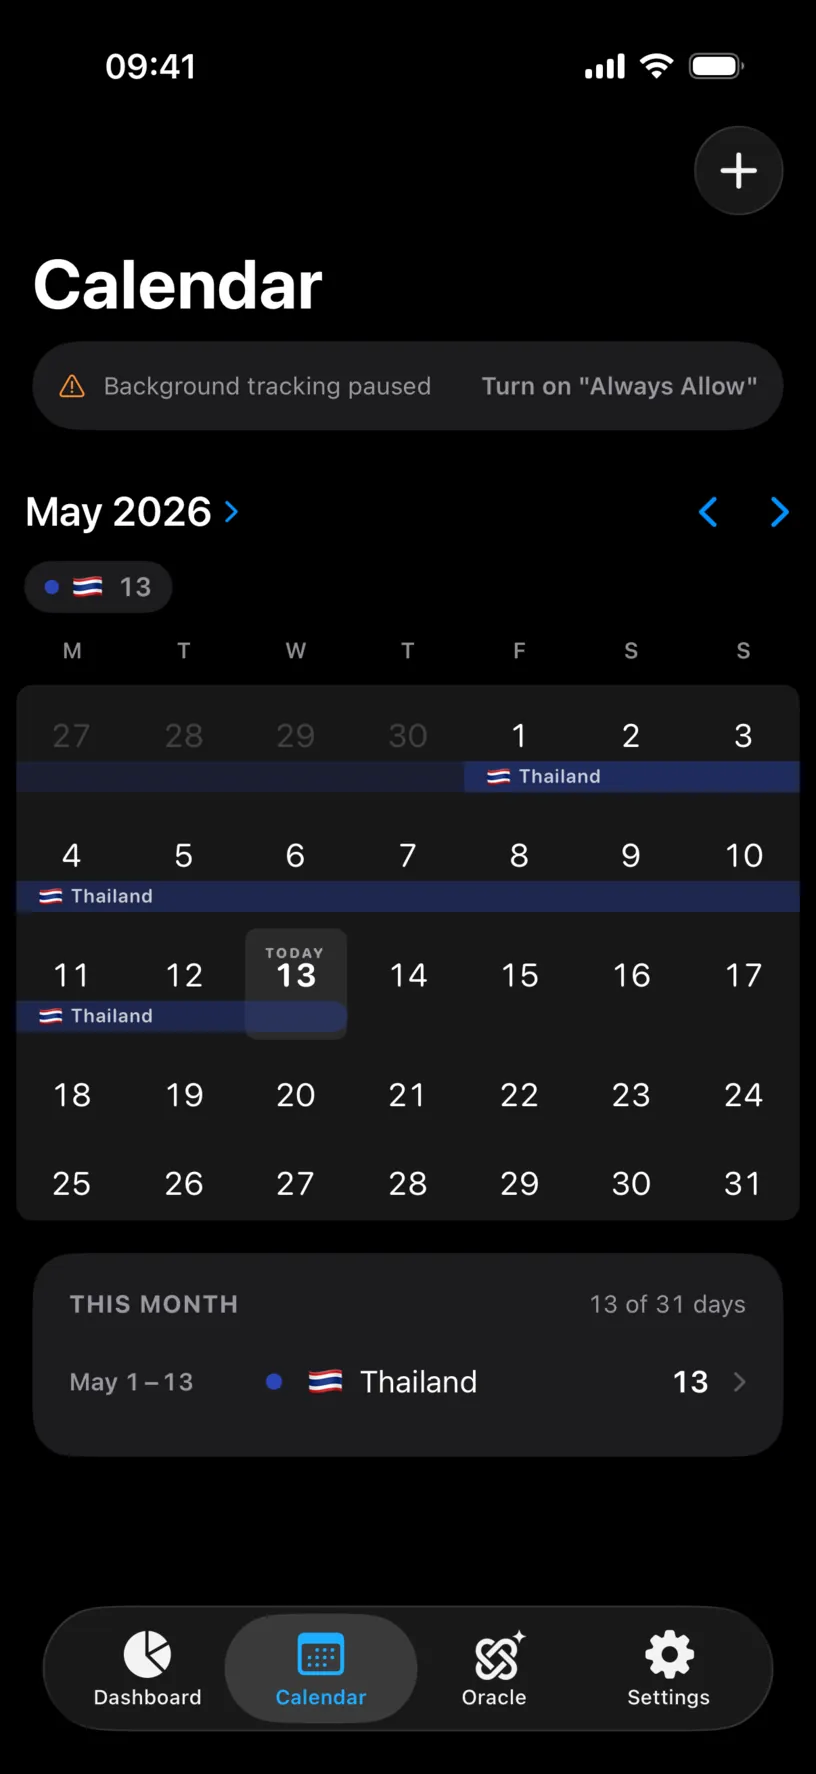
The pill has two wordings. Background tracking paused is the orange state, where the app works only while it is open. Location tracking is off is the red one, where nothing is being logged at all.
When everything is working the pill is not there. Its absence is the good news, and the space goes back to the month.
Check your result
Look at the same state in two places and confirm they agree: the Status line in Settings, and the Location tile on your dashboard. Both read from the same two facts, the switch and the permission, so they can never disagree.
If both are green, open the Calendar tab and look for the pill above the grid. There should not be one.
If something looks different
The status is orange and the button says Open Settings instead of Turn on “Always Allow”. The one-shot Always prompt has already been used. iOS will not show it again, so the app sends you to the Settings app, where the answer can still be changed.
The tile shows a country but a red status. The country comes from your logged days, not from live tracking. The tile keeps showing where you were last recorded even when it has no way to record a new day.
The tile says Nothing logged yet. There are no days in your calendar at all. Add one by hand or import your history, and the tile starts naming a country.
The status is green and today has no entry. Automatic tracking waits for a significant location change rather than polling, so a day spent in one place can take a while to appear. It fills in on its own.
There is no room for the Location tile. The strip holds three. Remove one in the widget editor with a left swipe, then add Current location.
Next steps
Choose the right location permissions covers the four iOS answers behind the orange and red states, and how to change the one you gave.
Turn on automatic location tracking is the full setup, from the switch to the second prompt.
Read your dashboard at a glance explains the rest of the widget strip the Location tile just joined.